As one of the strongest chess engines in the world, Stockfish is an ubiquitous tool for learning and analyzing chess games. Scid vs PC, on the other hand, is a popular open-source chess GUI toolkit with powerful functionalities. For Scid vs PC to be useful, it usually requires setting up a chess engine to provide game analysis capabilities. However, the process of setting them up together is quite sophisticated and sometimes even frustrating. This guide gives step-by-step instructions on how to set up Stockfish with Scid vs PC.
Step 1. Download Stockfish
To download Stockfish, go to the Stockfish offical website. For MacOS users, the App Store version of Stockfish won’t work with Scid vs PC. Therefore, it is recommended to install Stockfish via Homebrew.
For Power Users: If you are looking for the development version of Stockfish, then you can either compile Stockfish yourself or download precompiled binaries at abrok.eu or Stockfish’s Github repository.
Step 2. Install Scid vs PC
If you already had Scid vs PC installed, skip to Step 3.
To install Scid vs PC, run the installer for Windows, MacOS, or Linux and follow the instructions.
Step 3. Configure Scid vs PC
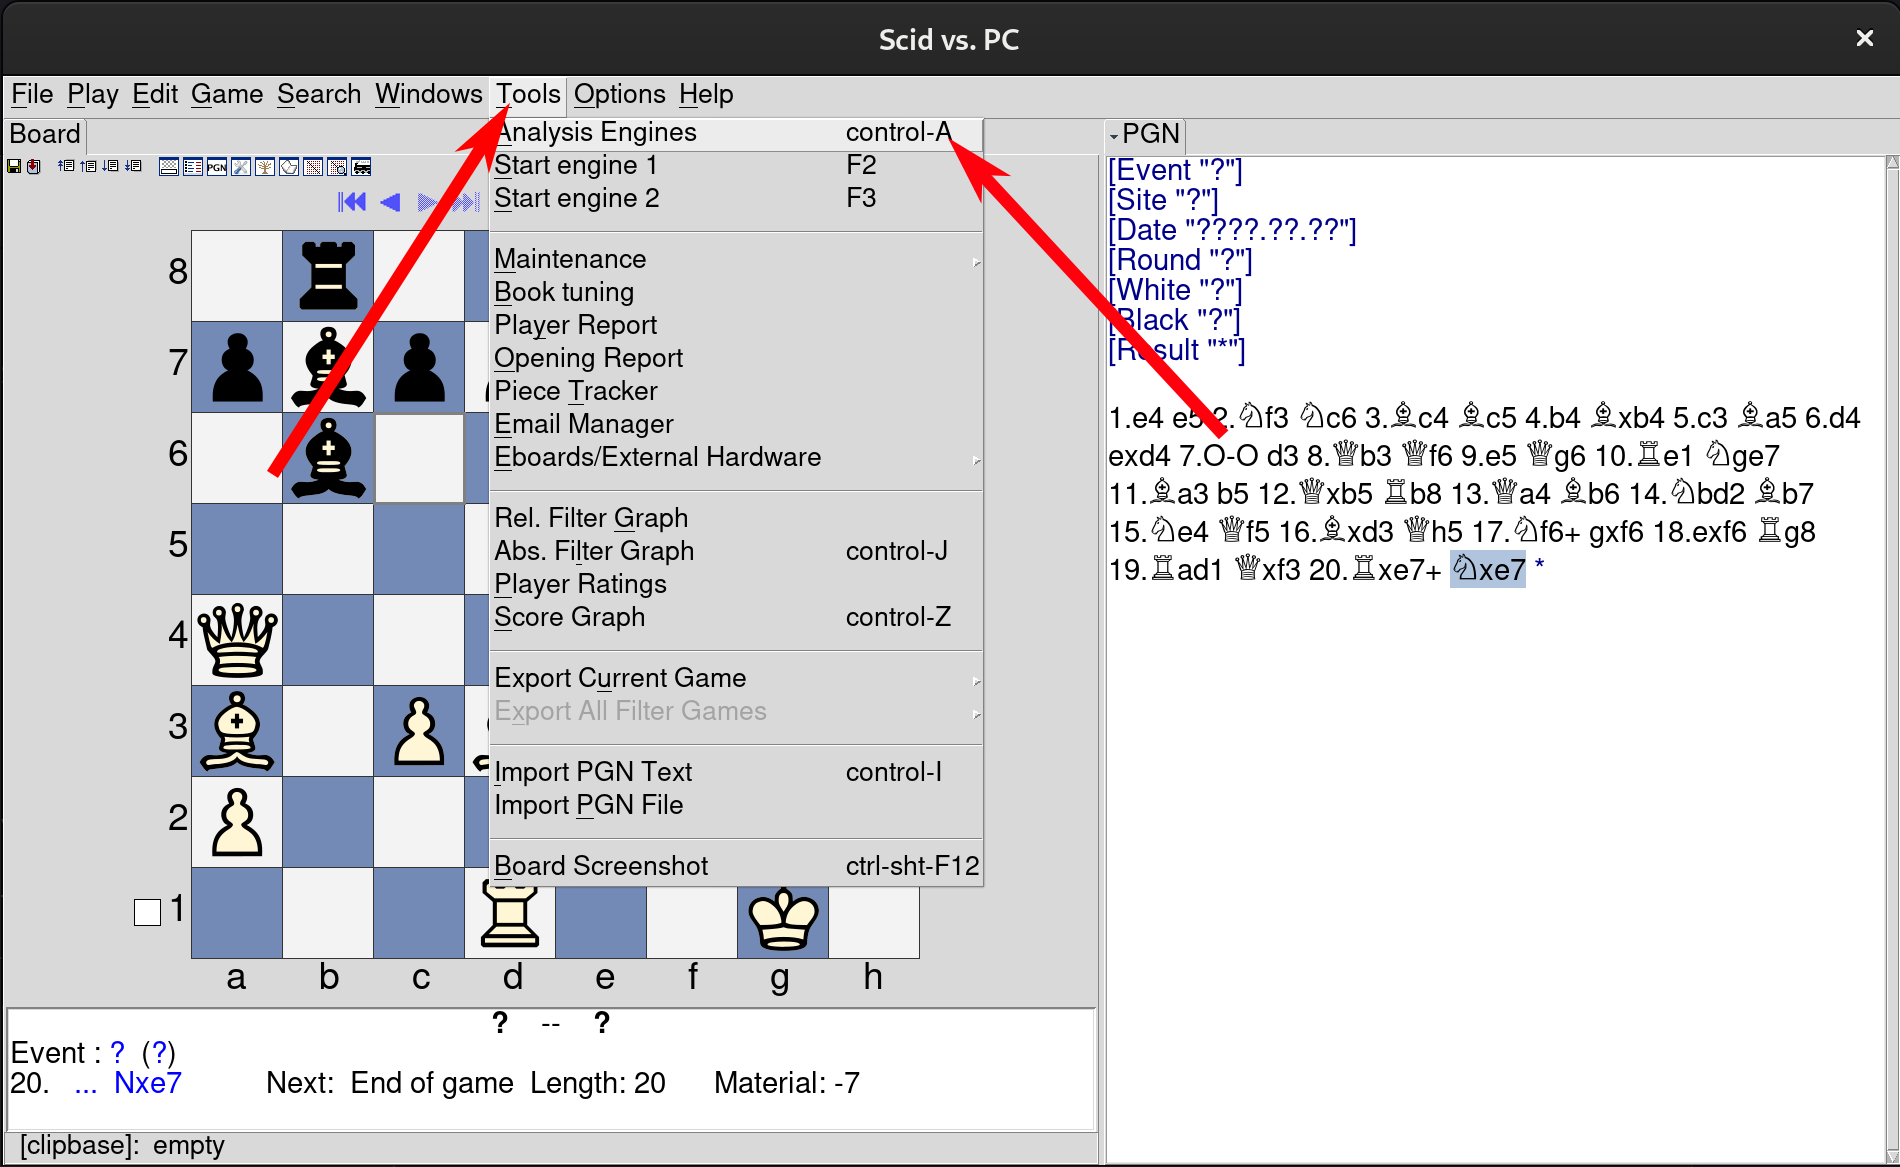
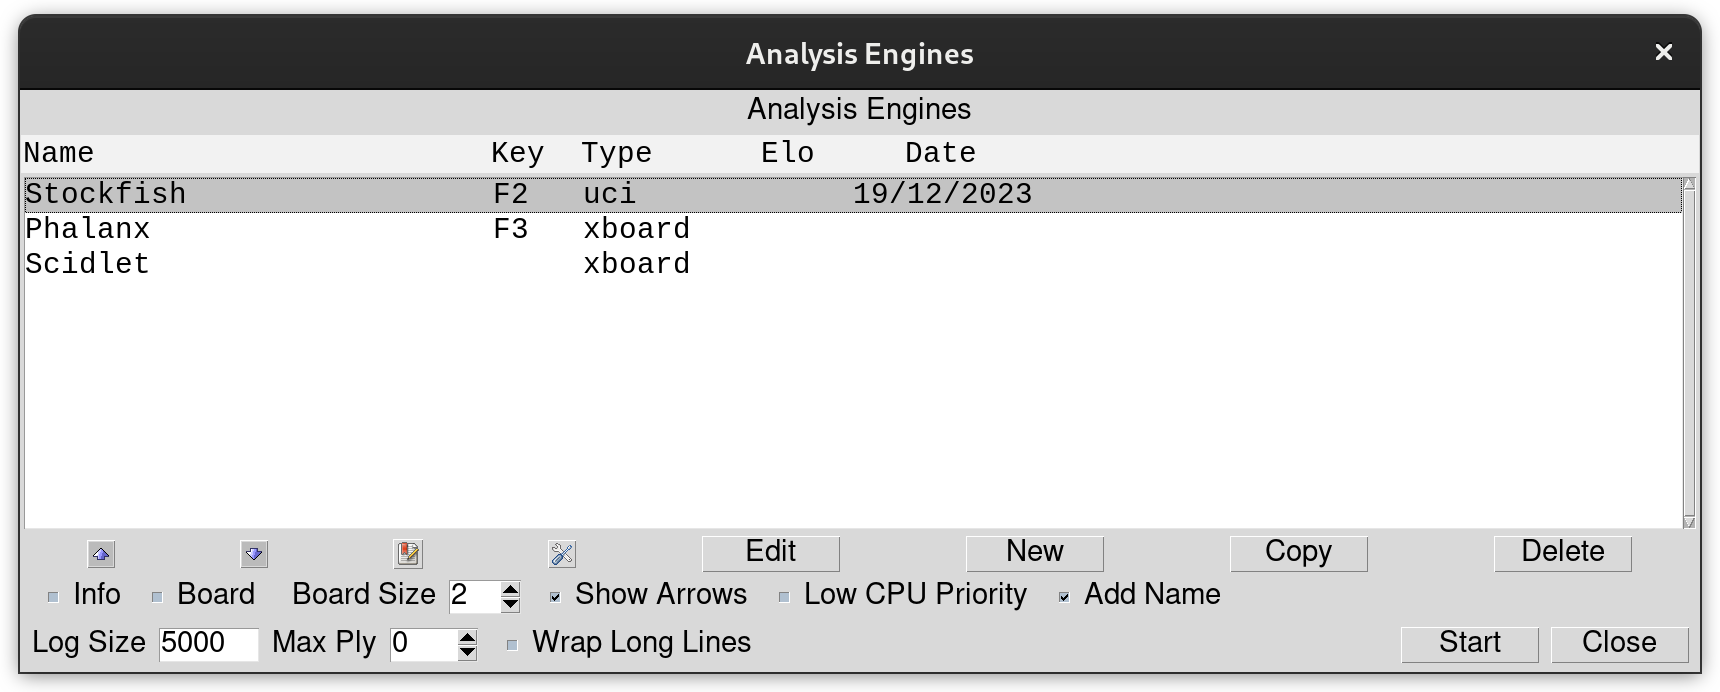
Open Scid vs PC, and on the top menu, click Tools. Then, from the drop down menu, click Analysis Engines. A pop-up window will appear.
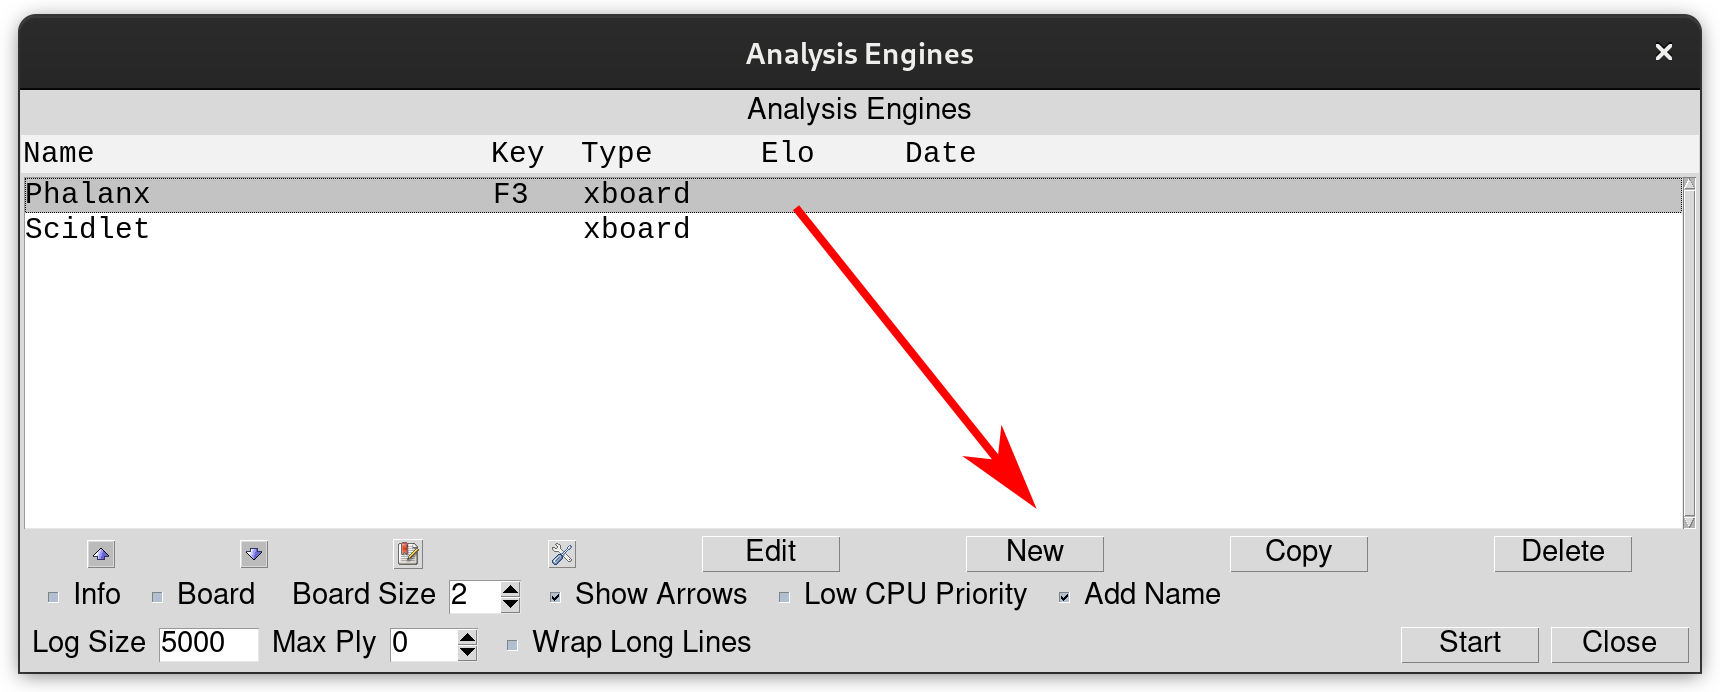
Here, you will see a list of all engines Scid vs PC is able to access. Since Stockfish is not yet recognized by Scid vs PC, we need to add a new entry by clicking on the New button. It will lead to another pop-up window.
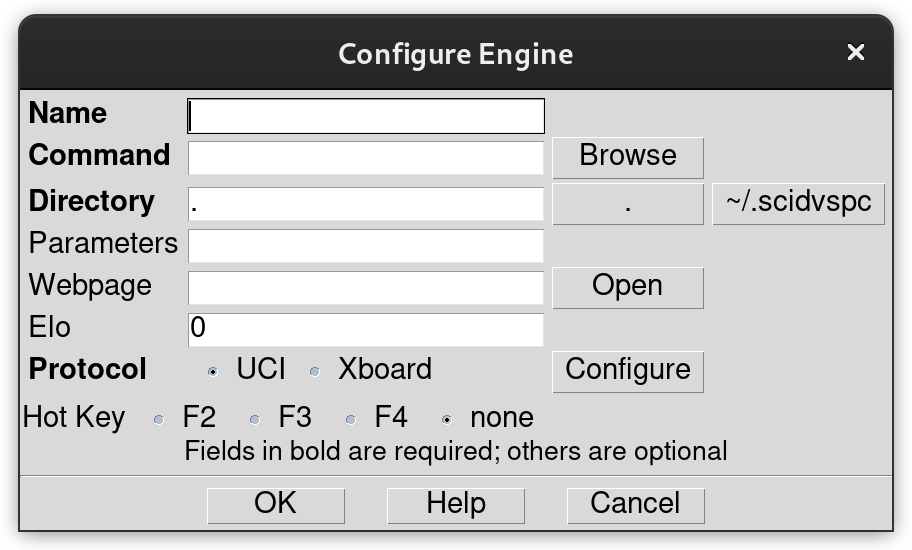
Here, you will be faced with a lot of options, four of these are mandatory, while the rest are optional. Let’s start with the easier ones:
- Name: This is the name of the engine for your reference. To avoid confusion, it is recommended to put in “Stockfish” as the name of the engine.
- Protocol: Stockfish only supports the UCI protocol, so you should make sure that UCI is chosen instead of Xboard.
- Directory: The default value should work fine.
Now, for the command field, you need to fill out things differently depending on the way you installed Stockfish.
- If you downloaded Stockfish directly from the website, then you should put in the path to the downloaded program. If you need help in finding out the path to the Stockfish program, refer to this guide.
- If you are a MacOS user and you installed Stockfish through Homebrew, then simply type “stockfish” (without the quotation marks) in as the command.
After filling in all the required fields, click on “OK” to finish setup.
Step 4. Start up Stockfish
Now that everything is configured, you should see Stockfish listed as an entry in the list of analysis engines.
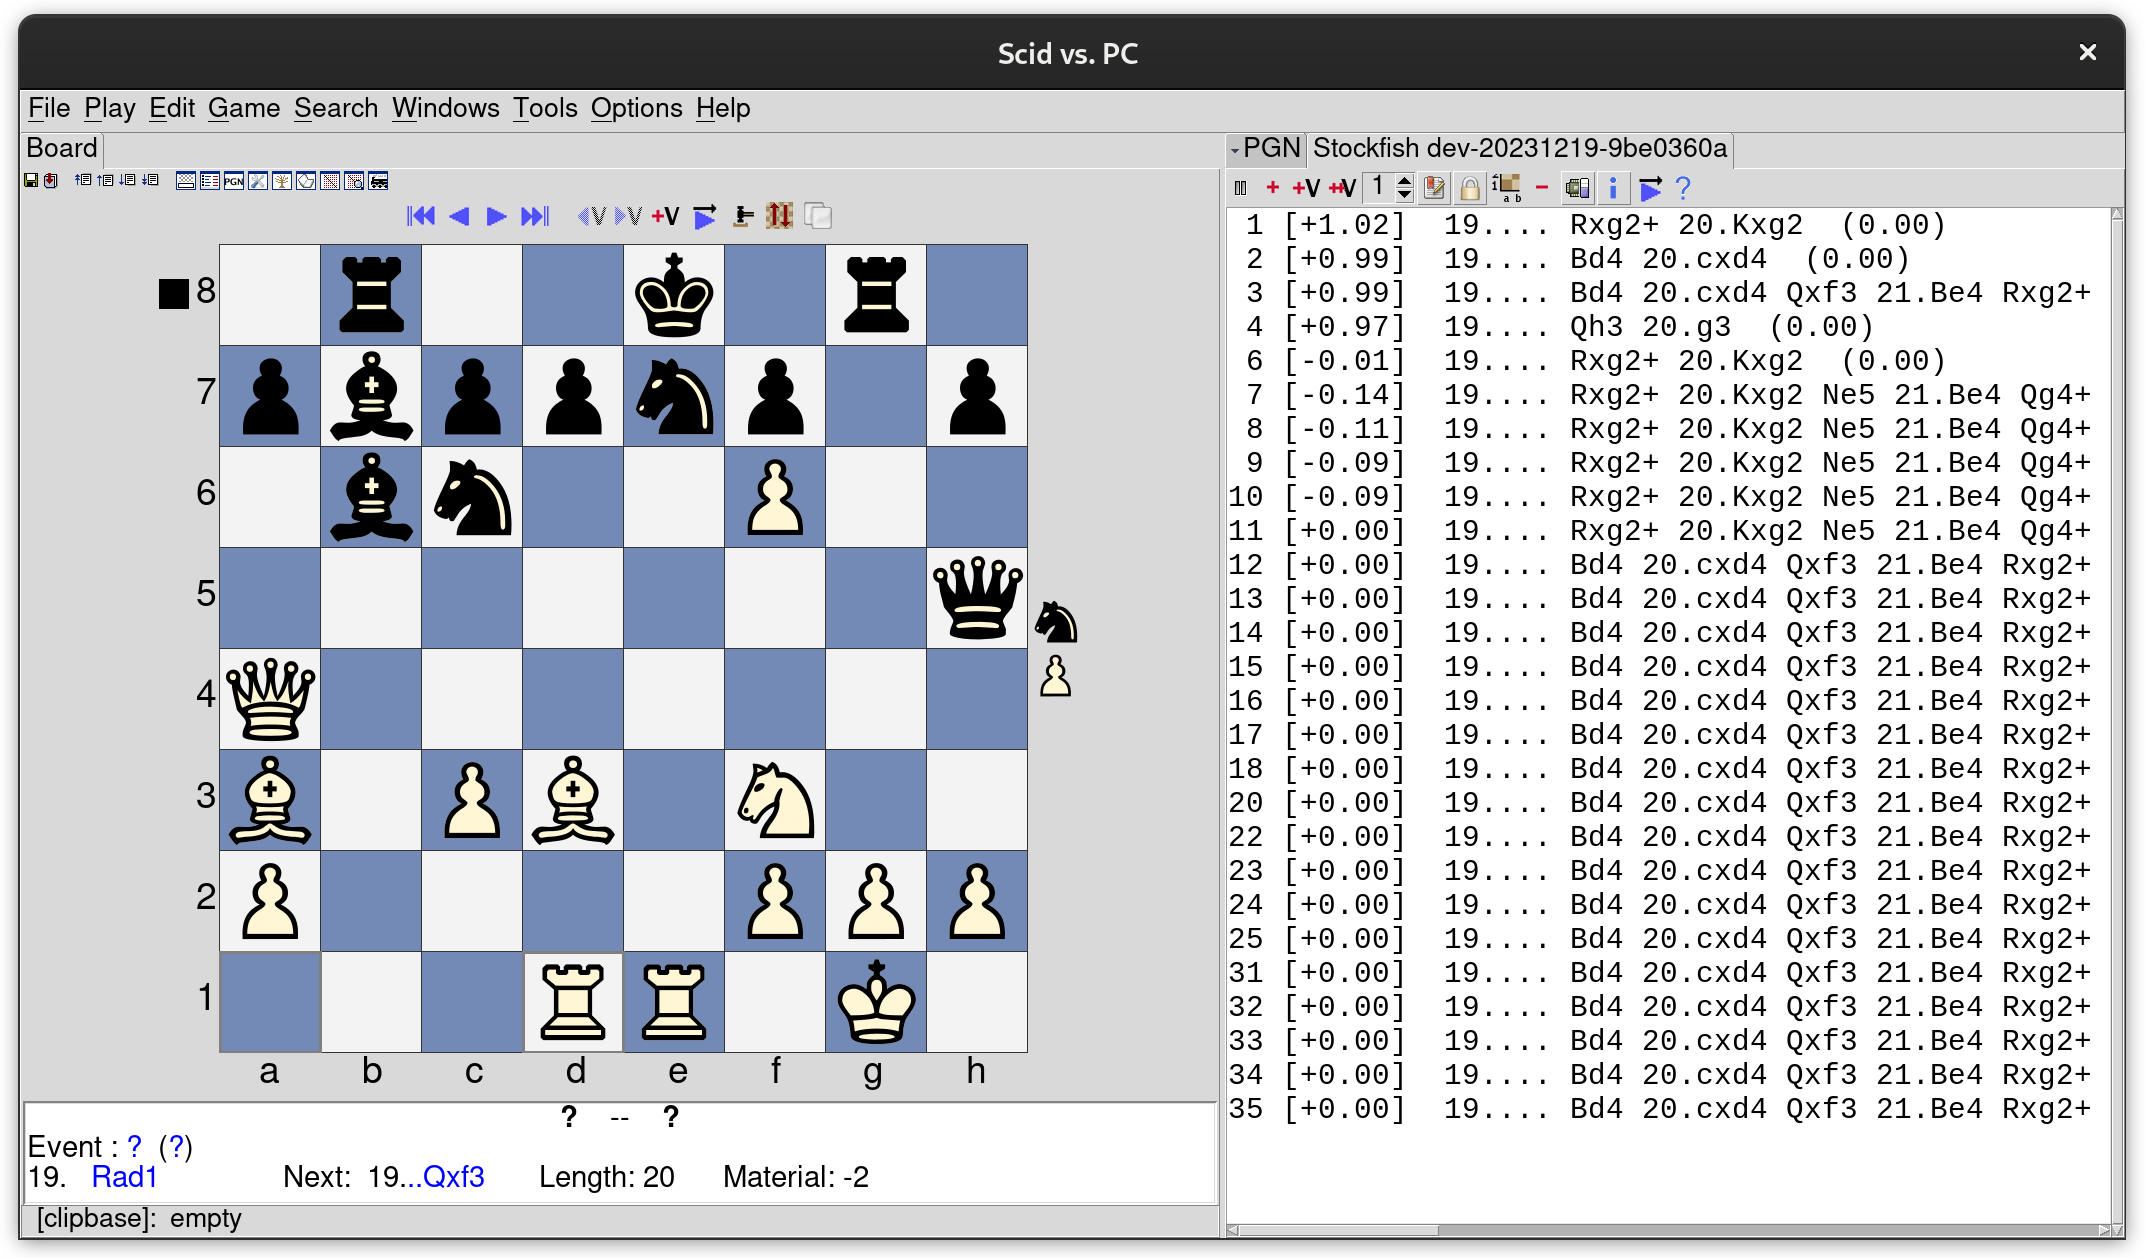
Double click on the Stockfish row, and the analysis will begin.
Leave a Reply